Materials Needed:
1. Autoclavable graduated media bottles at 500 ml capacity plus open-ended caps with silicone septums for sterile needle access---though one can use the plain cap, if you want to reuse the sterile water bottle. I like the larger GL45 thread on them so that I can screw on the below described filtration systems. These can either be used as the final solution treatment bottle with the rubber septum or as a mixing bottle for later transfer back into the sterile water bottle from which the sterile water was poured.


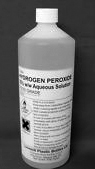
2. Use only USP, reagent or food grade hydrogen peroxide (35%) which can be purchased online or at some health food stores. When not in use, store your H202 in the freezer in upright bottle. Also protect all H202 solutions from prolonged unfiltered sunlight and heat. Even at low dilutions, hydrogen peroxide will decompose continuously into water and oxygen. This rate is very low when hydrogen peroxide is stored in approved materials and is kept free from contaminants. However, if oxygen pressure is not relieved, then high gas pressure may build up.
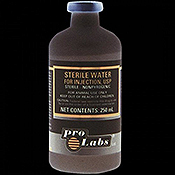
3. Sterile water USP, 250 ml. This may be a bit harder to find, but there are pet and veterinary suppliers that will sell it without a prescription. Worse comes to worse, one can purchase it directly from your local vet. Buy only the pure sterile water. Do not buy a saline solution, etc. Laboratory ACS or reagent grade water (ASTM Type 1) is an ultrapure water and can be interchaged for USP grade.
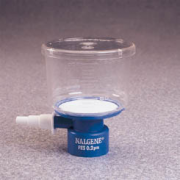
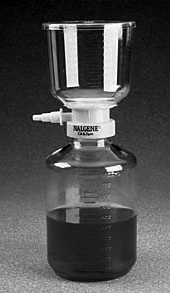
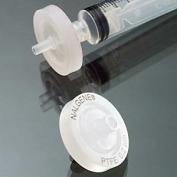
4. A sterile 0.22 micron or smaller pore syringe filter, if you want to get by on the cheap. I recommend a nalgene media bottle filter system or a similar brand. The Nalgene filter below can screw directly on the above described glass GL-45 media bottles for easy formulation. The 0.22 micron filter will filter out most known bacteria and particulates and is the industry standard for filtering injectables. Don't use a filter membrane with larger pore size than 0.22 microns. In this case, smaller is better. A vacuum pump will be needed to properly filter solution in these units except the syringe filter type which uses a simple syringe.
syinge filter that fits on end of a syringe
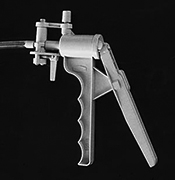
5 ,. A vacuum pump either of the electric or hand variety to suction the cs solution through a filter membrane in the above unit. Nice cheap electric units can be purchased at Harbor Freight for $100-$150 and is what I use. If you want to get buy on the cheap, buy a hand pump like below:
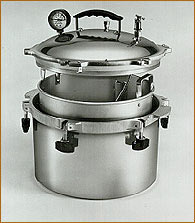
6. Autoclave or a pressure cooker that can achieve at least 15 psi. I like the All American brand sterilizer pictured below that will go 17-20 psi. For the money ($250-350) and compactness, it is hard to beat and has a good resell value. It can be purchased used on ebay for much savings.
7. In order to formulate such small volumes in these low percentage injectable solutions, one needs a pipette controller and an appropriate sized pipette. This is a must if you want to add Hydrogen peroxide to your sterile water. Example:


Procedure to formulate an injectable Hydrogen Peroxide solution:
1) Sterilize by placing all glassware you plan to use along with your empty 500 ml glass media bottle or appropriate glass vial into an autoclave or pressure cooker to sterilize, along with any other items which you may use and should be sterilized. If you use a kitchen type of pressure steam cooker, make sure that this utensil can achieve at least 15 psi. You will place your bottle or bottles and all other glassware on their side, along with matching autocalvable bottle caps---all above the water line via some type of metal rack. Only steam must come in contact! One should not attempt to sterilize bottles sitting straight up, plus caps should not be on them. Jars standing upright tend to trap air and are hard to sterilize. They should either be inverted or placed on their sides. Place the empty bottle and caps on their side. Seal the cooker and heat until a steady stream of steam comes out of the top outlet. It is important to make sure that steam pushes all trapped air out of the cooker before beginning the sterilization cycle. Once you get a steady stream of steam, seal escape valve and place on the weight or start monitoring temperature with steam at 15-21 psi for 30 minutes depending on system mechanics. Be sure to allow for cooling before opening. As soon as the seal is cracked, you should hurry and use as aseptic technique as possible under the circumstances, i.e. speed with gloved hands and sterile forceps in a dust free environment. Prolonged contact with outside air will open up chances of contamination. Condensed water on the bottles and caps should be no big problem.
Remove the sterilized glassware from the cooled pressure cooker via rubber gloves or forceps. Placing the matching sterilized caps on to maintain sterility of inner bottles in the outside setting until they are ready to fill.
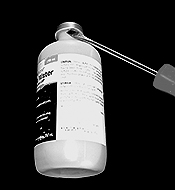
2) Next, take your 250 ml jug of sterile water and with a screw driver, gently pry up the crimped edge of its metal cap at the bottom and lift it off leaving the rubber septum in place. I do this because I will want to reuse the cap and original bottle of the sterile water. If you don't want to go that route, discard the empty sterile water jug and plan to use a sterile media bottle as described above instead. This is acceptable.
4) Take your pipette and pipette controller, draw up 0.268 of a ml of the 35% H202 stock solution and add to your 250cc jug of sterile water. This will produce a .0375% Hydrogen peroxide solution at approximately 250cc. Yes, to be correct you would only use 249cc and a bit of water, but the volume is so small and the concentration not that vital that just leaving the water volume alone, rounding off to a full 250cc to get roughly your 0.0375% of Hydrogen peroxide is acceptable and not worth the effort to be more precise.
For the stronger 0.15% solution of a hydrogen peroxide 250cc volume that is sometimes used for more acute infections, you would add 1.07 ml of the 35% stock solution to your 250cc volume of sterile water to get approximately a 0.15% H202 solution. Again, not exactly precise, but this is close enough.
In order to formulate such small volumes in these low percentage injectable solutions, one needs a pipette controller and an appropriate pipette ( a pipette that will allow you to measure in one thousandth of a milliliter: 0.268 ml. of hydrogen peroxide to be exact.
5) Next, filter the final solution through your filtration device, whether you choose to use a syringe filter or a media bottle filtration system. I prefer the latter:
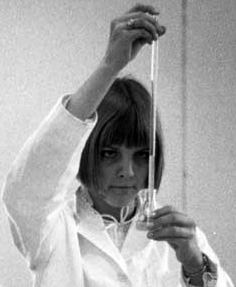
using a pipette to measure small volumes
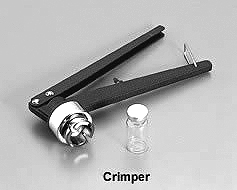
Using a flat screwdriver to re-crimp the septum cap back to the way it was.
Finished and back to the way it was as an unopened cap. Ready to inject.

Dr. Farr is the clinician that has accomplished some landmark protocols employing hydrogen peroxide, and I will base my below formulations on his research and clinical experience as applied to humans. His basic hydrogen peroxide injectable concentration of 0.0375% will be our ideal concentration and should be equally appropriate for equine applications. However, saying this, Dr. Farr often used 0.15 to 0.3% concentrations in acute pathologies with good results. The general rule is that the more acute the disease, the greater the amount of peroxide which will be needed. Chronic cases should be treated with the weaker 0.0375% dilutions. One should look for a clinical response and go from there on how to prescribe progressive dosages and dilutions of hydrogen peroxide.
Due to the instability of Hydrogen Peroxide, it really needs to be made fresh and used immediately. This is why it is not really feasible to produce it to sell. One needs to produce it on the premises for medicinal use.

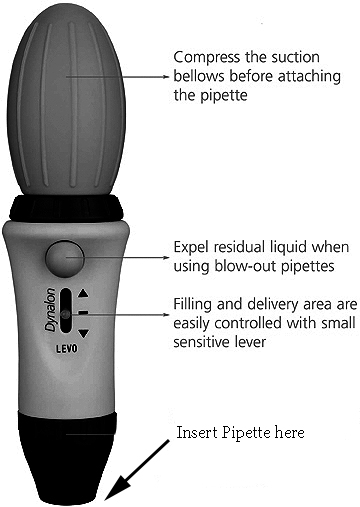
This is a nice type of pipette colntroller that can sometimbes be purchased cheaply on ebay.
7. Finally, pour the filtered final solution of hydrogen peroxide back into the original sterile water 250cc jug or keep in this media bottle, adding appropriate caps and septum. If you pour back into the plastic sterile water jug, replace the rubber septum and re-affix the metal septum cap which you previously took off with a screw driver and carefully re-crimp the raised edge with a larger flat screw driver to permanently reattach cap. If you have bucks, you can buy a 30mm crimper, but a screwdriver can work as well.
When working with injectables, it is always a good policy to formulate in as sterile conditions as possible. Accordingly, I use a lab glovebox similar to the above which I made and will keep your materials isolated from contamination form the outside air. It can be made cheaply and I have a webpage detailing construction.